Step 1: Downloading and Installing Zoiper 5
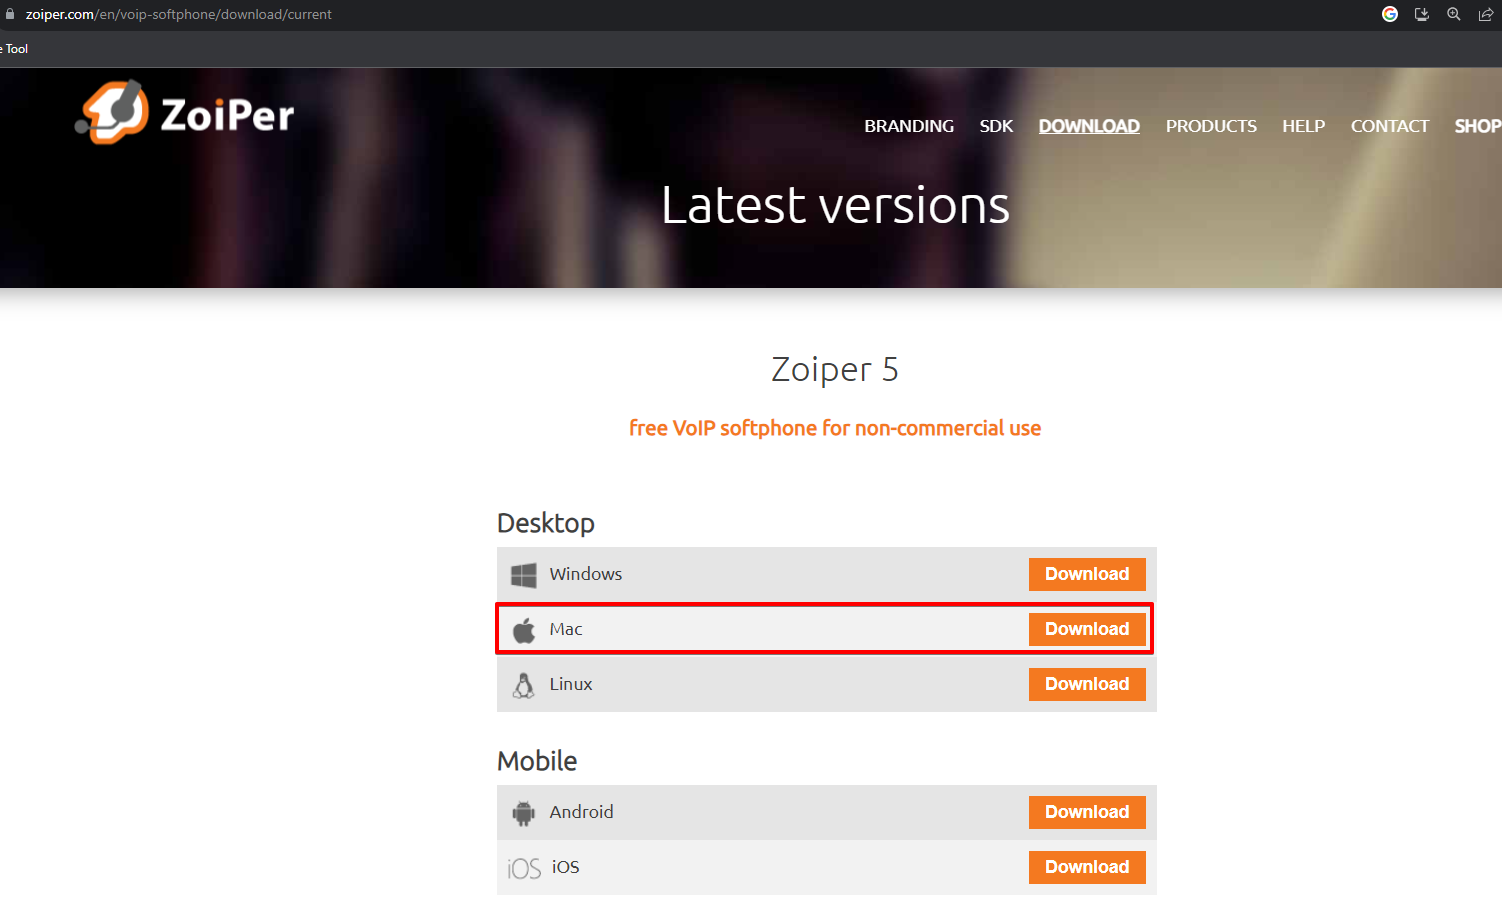
Open a web browser and go to the official Zoiper website
Download the appropriate version of Zoiper 5 for Windows and follow the installation.
ㅤ

ㅤ
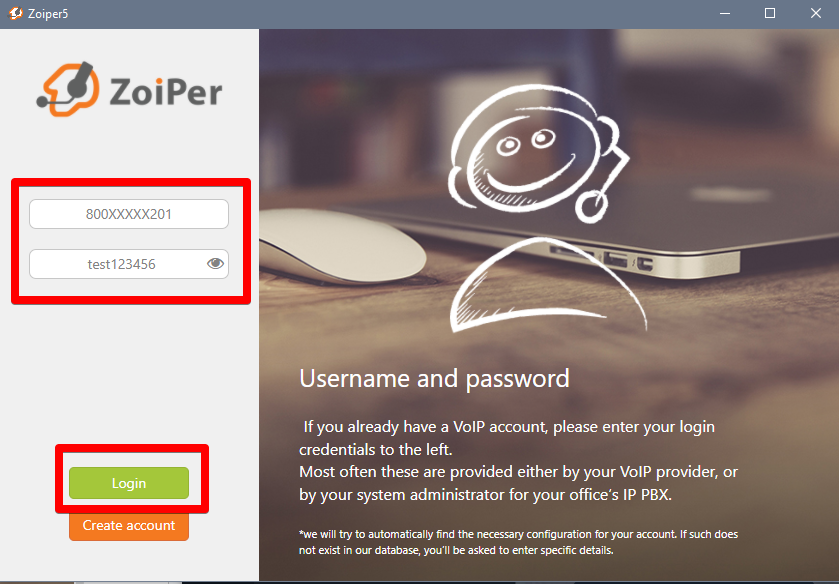
On the next screen, enter the following data in the Username/Login and Password fields:
- Username: 800XXXXX201
- Password: test12345
Click on “Login”.
ㅤ
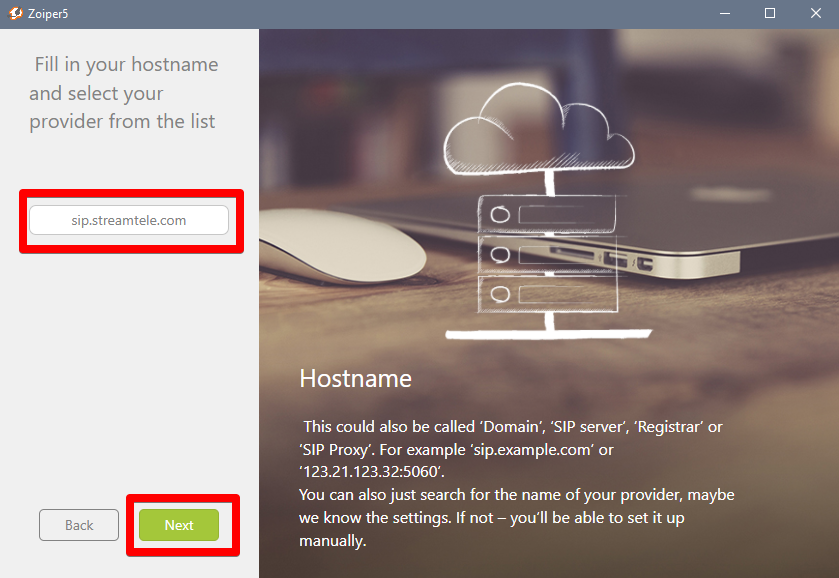
Enter the server address:sip.streamtele.com
The server address may differ from the one mentioned in the instructions or provided to you by us
ㅤ
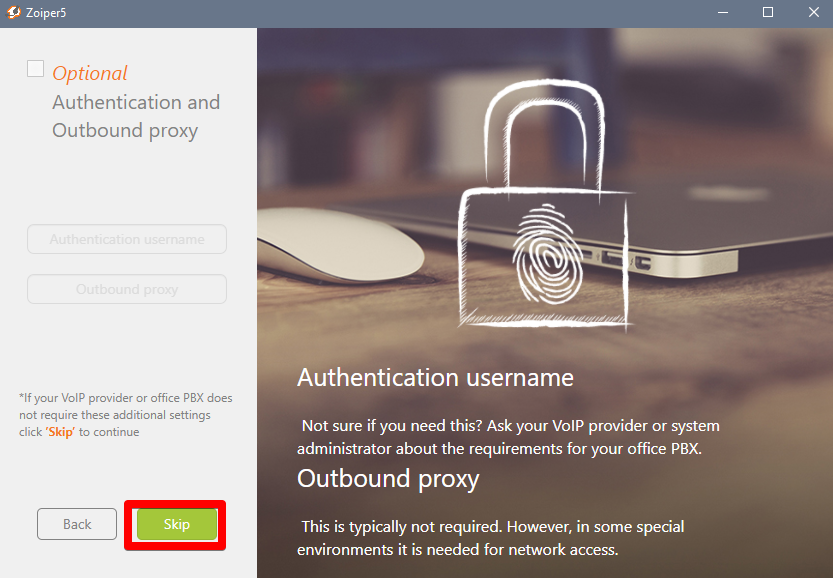
Click “Next”, then “Skip”.
ㅤ
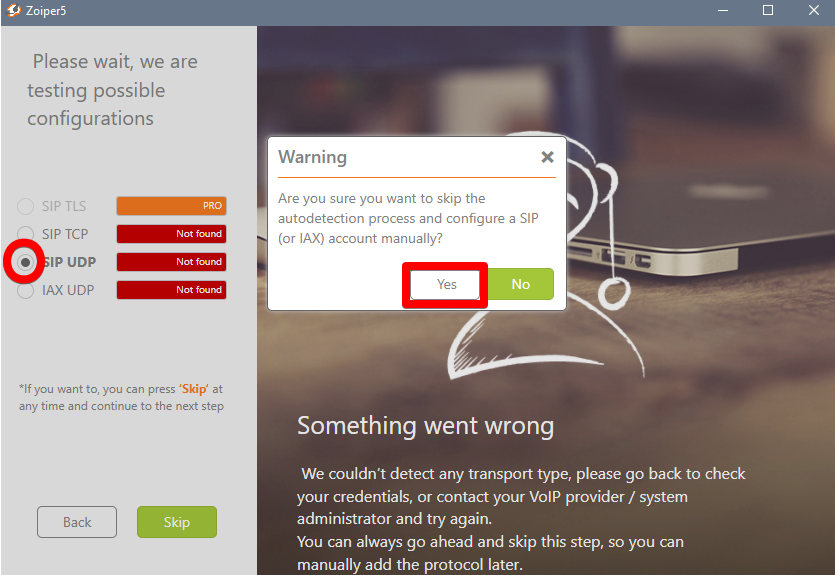
On this screen, choose SIP UDP and click “Skip”. In the popup window, click “Yes”.
ㅤ
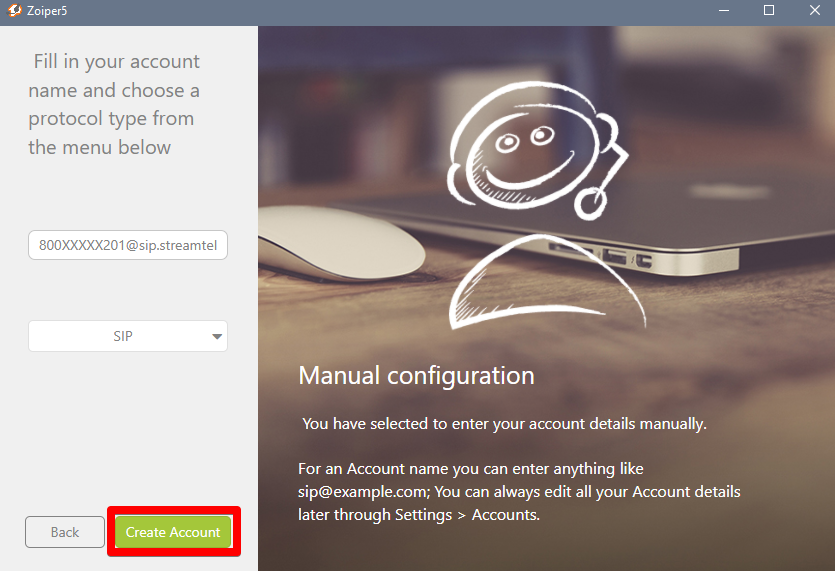
Next, at the bottom, click “Create Account”.
ㅤ
Step 3: Configuring Audio Codecs and Port
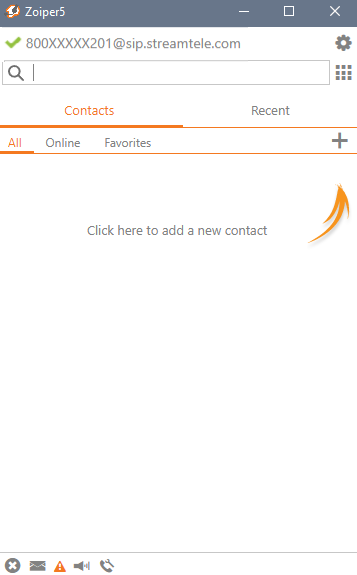
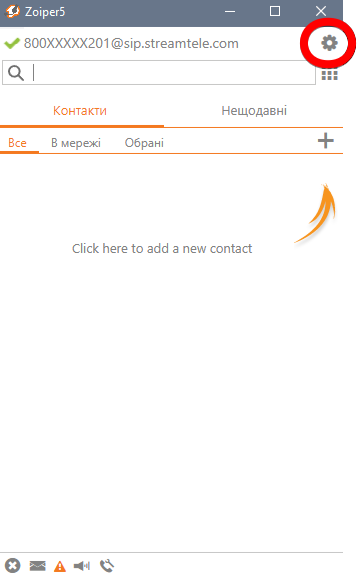
You’ll see a green checkmark indicating the line is active. In the upper-right corner, click on the gear icon.
ㅤ
This will open the settings screen. Navigate to the “Accounts” section.

ㅤ
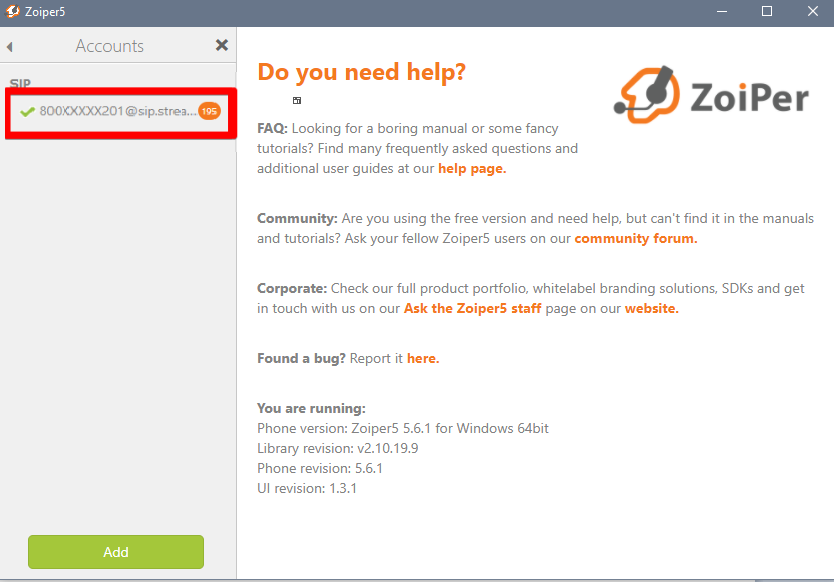
A menu with a list of accounts will appear. Find and click on our account in the list.
ㅤ
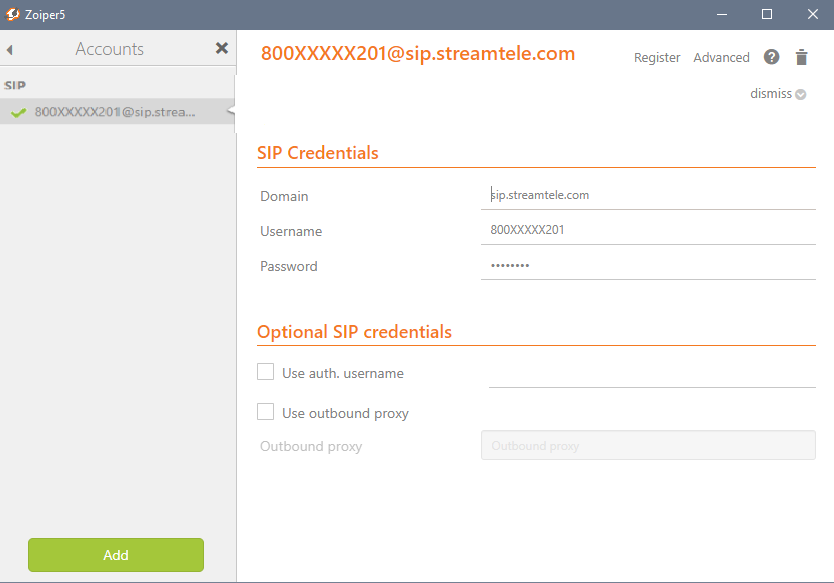
On the top-right, click “Advanced”.
ㅤ
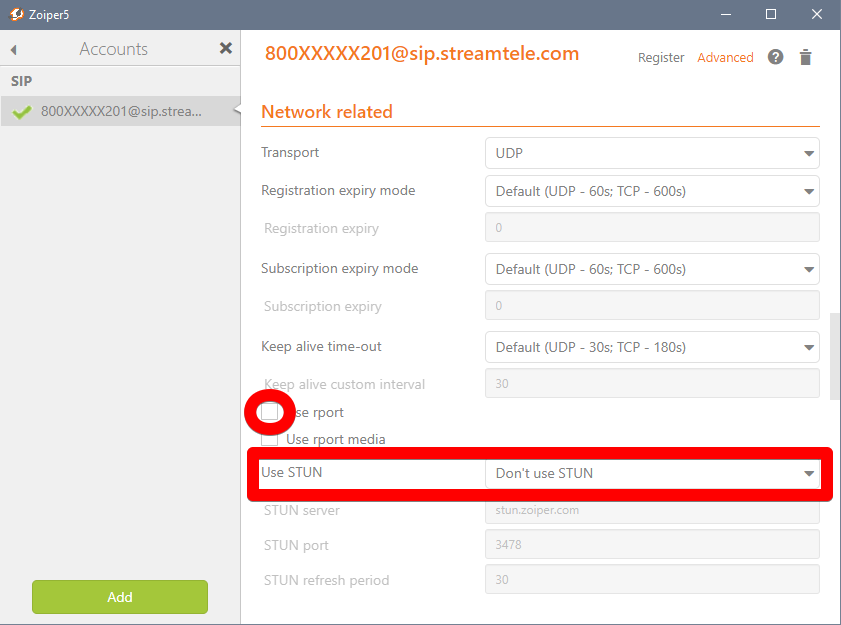
Scroll down and find the “Network Related” section. Uncheck “Use rport” and change “Use STUN” to “Don’t use STUN”.
ㅤ
In the “Audio Codecs” section, leave “G.711 A-law” and “G.711 μ-law” selected, as shown in the screenshot.

ㅤ
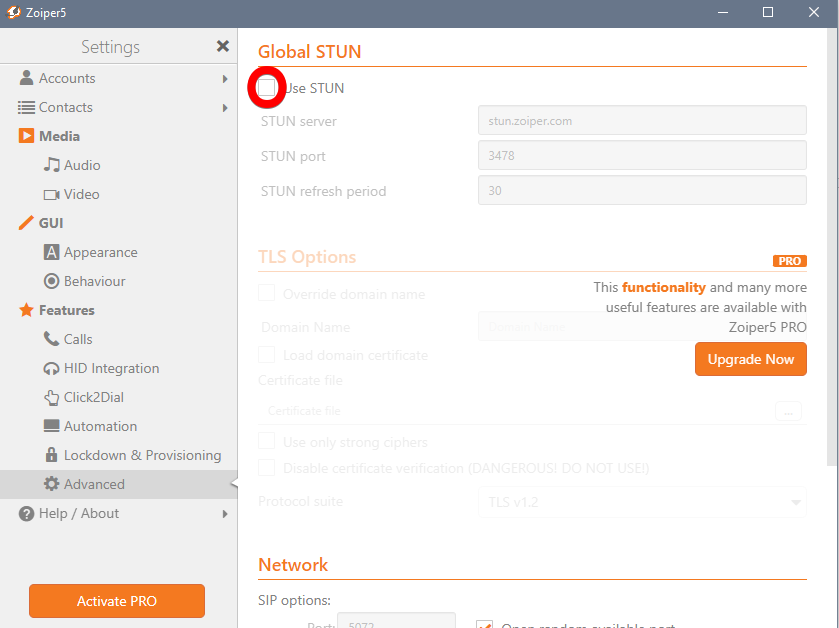
In the “Advanced Settings” section, uncheck “Use STUN”.
ㅤ
Below, in the “Network” section, uncheck “Open random available port,” and in the port field, specify a local SIP port in the range of 5060 to 5090, incrementing by 2 (5062, 5064, 5066…).
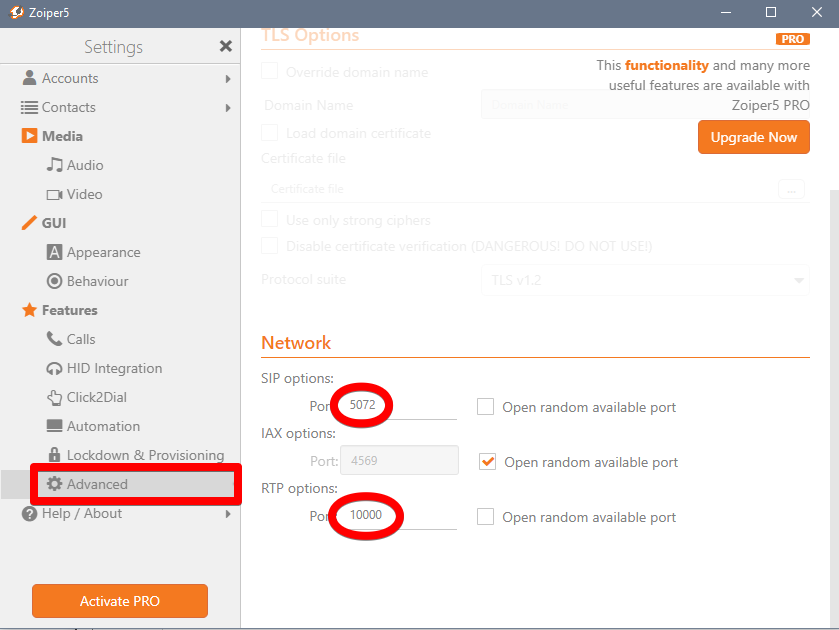
ㅤ
After configuring, click the close button in the upper left.

ㅤ
Once configured, the main window should appear with a green checkmark indicating an active line. The configuration is complete.
