Step 1: Download and Install Telephone
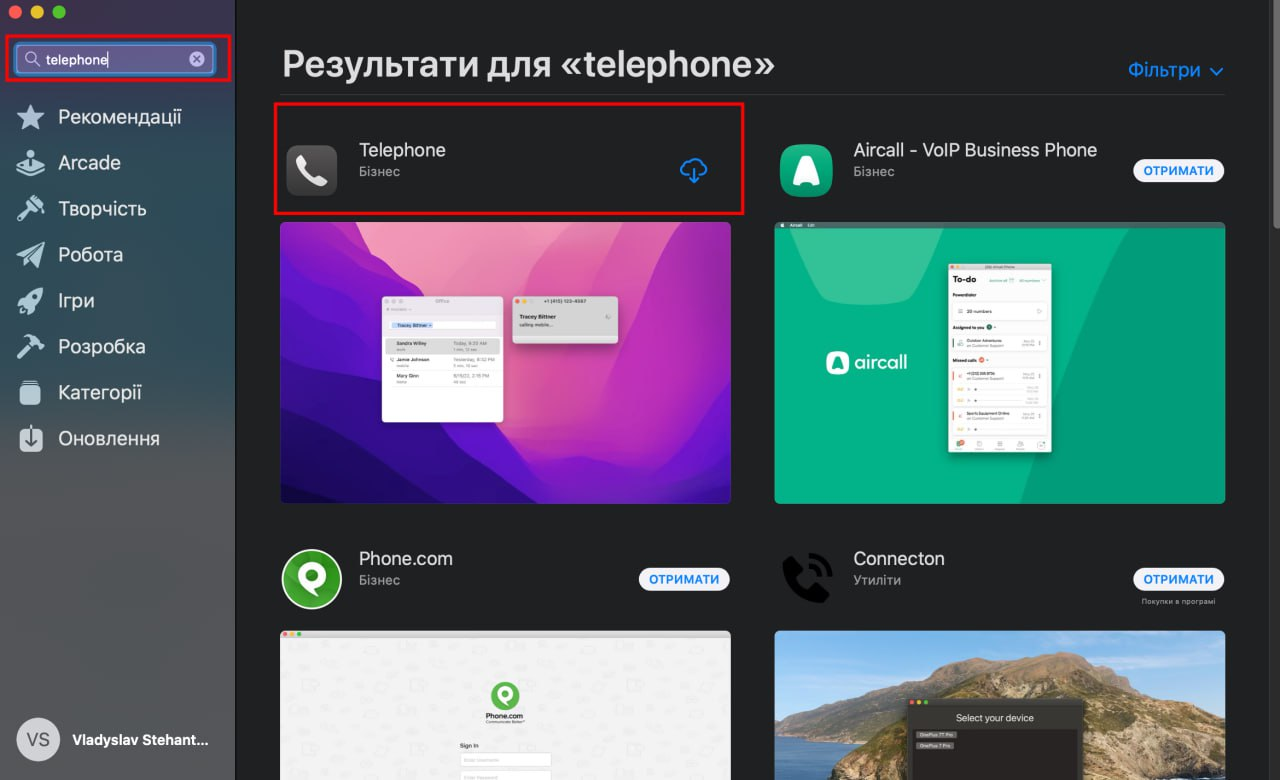
Open the AppStore and search for “Telephone” or follow the link to install Telephone.
ㅤ

ㅤ
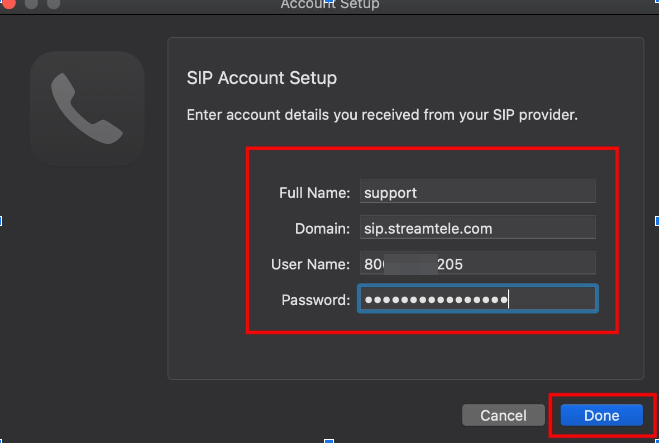
Next, fill in the fields as shown in the screenshot below:
- Full Name: support (or any name)
- Domain: sip.streamtele.com
- User Name: 800XXXXX201
- Password: test1234
Note that the login and password in the instructions may differ from the ones provided to you
After entering the information, click the “Done” button at the bottom.
ㅤ
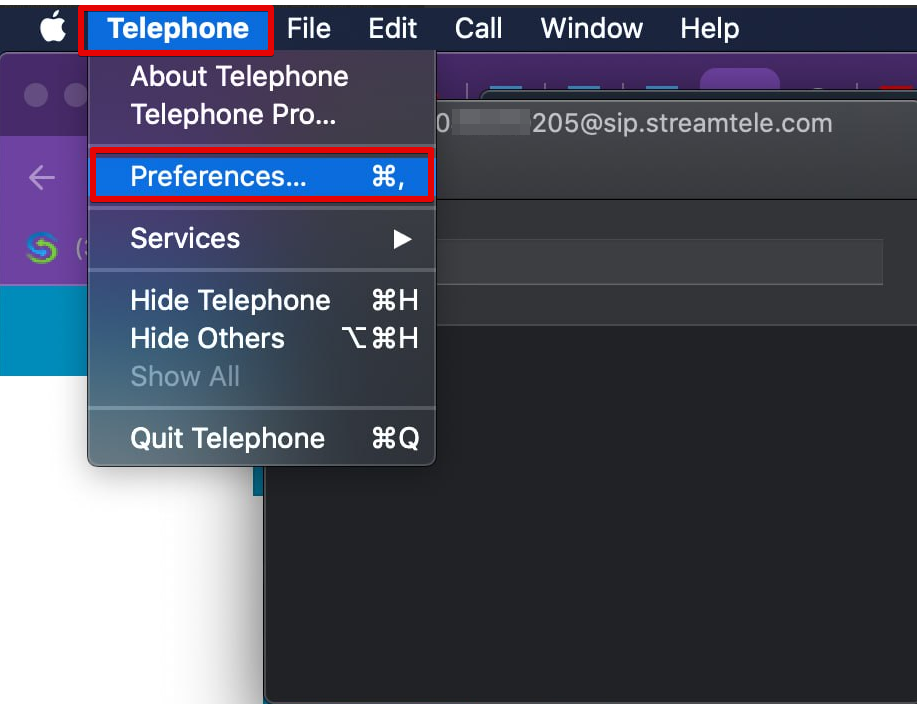
Once you’ve entered the line details, go to the app settings as shown in the screenshot.
ㅤ
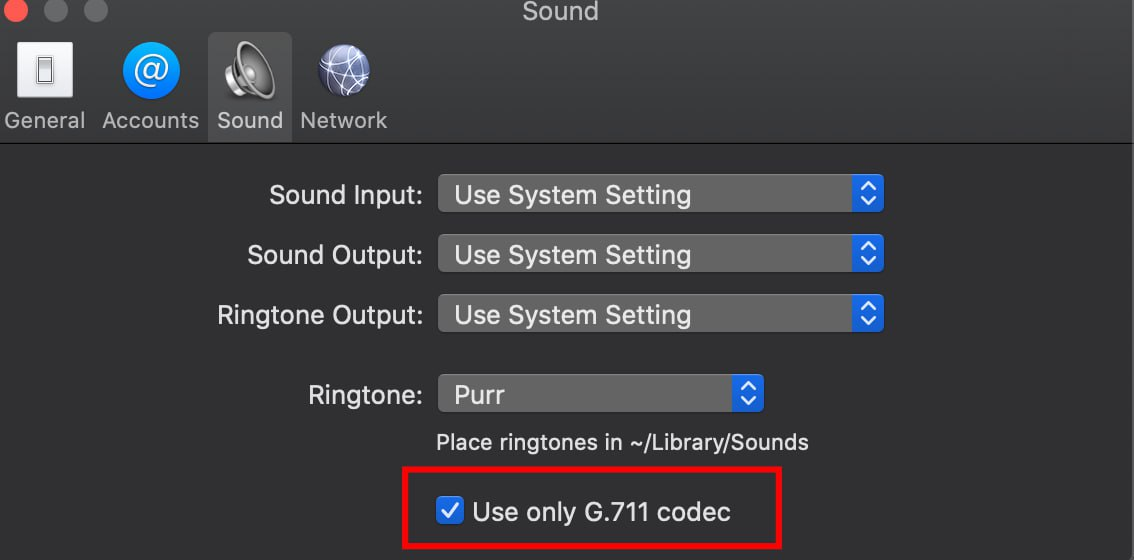
Navigate to the “Sound” section and check the box for “Use only G.711 codec”.
ㅤ
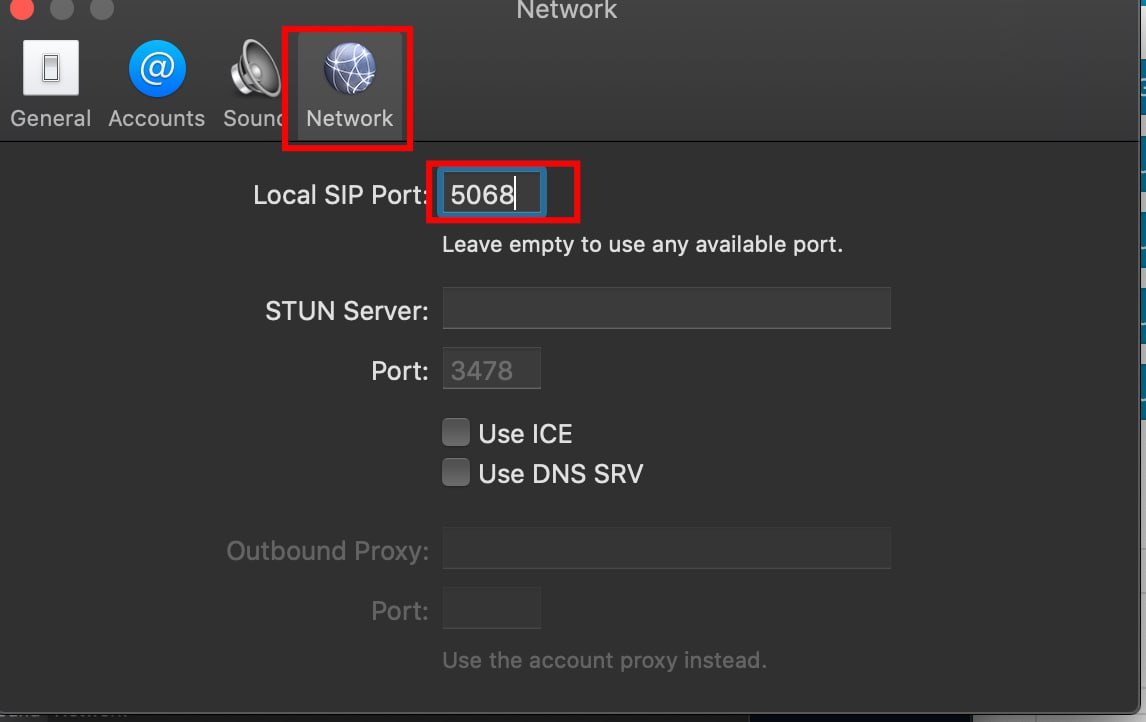
In the “Network” section, enter the “Local SIP Port.” Add a port in the range of 5060 to 5090, divisible by 2 (e.g., 5062, 5064, 5066…).
ㅤ
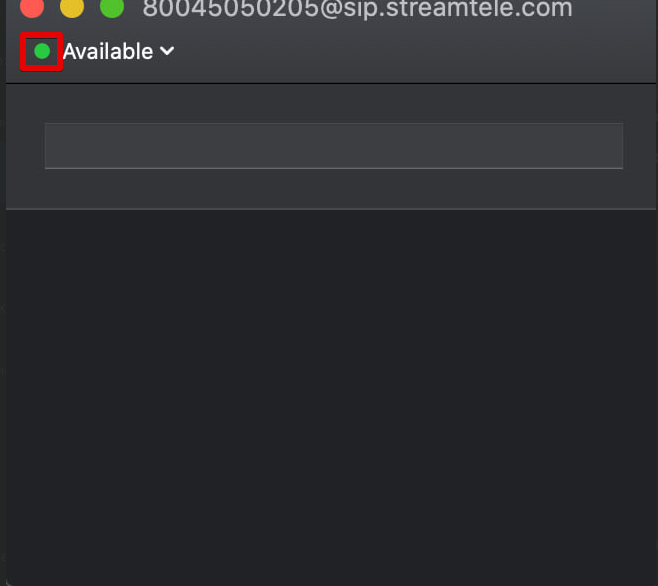
After saving the settings, you should see a green indicator indicating that the line is connected. Congratulations, the setup is complete.
